All Articles
HubPress.io - how to installl
Installation of HubPress.io
Writing blogposts is a proof-of-concept for me having them as a knowledgebase. For a some time when writing any note I use AsciiDoc(tor) format. Thus I started to search for option that allows me to write blog-notes that way too.
I could see that many people host blogs at http://github.io I decided to try that way too.
I started by looking for a tool to generate static webpages with AsciiDoc support.
There is the mostly used Jekyll - written in ruby, generating a webpage from template
on your local machine. There is plugin for AsciiDoc.
Other tool that I was evaluating was :awestruct.
Then I found HubPress.io that has a concept of a webapp whole written in javascript which generates static website directly in your browser sending it then to GitHub repo. Merit of this approach is a nice admin console in your browser. Flaw is a little bit longer waiting time to get post being published. The other could be current stall in the development process. But it seems not be fully true as there is new versions coming (see 0.8.0).
So far so good. I decided to give it a try.
Process of installation is quite simple - you fork repo, change config file and you can start to write a blog posts inside of the administration console.
Nevertheless check knowledgebase to HubPress and documentation on GitHub.
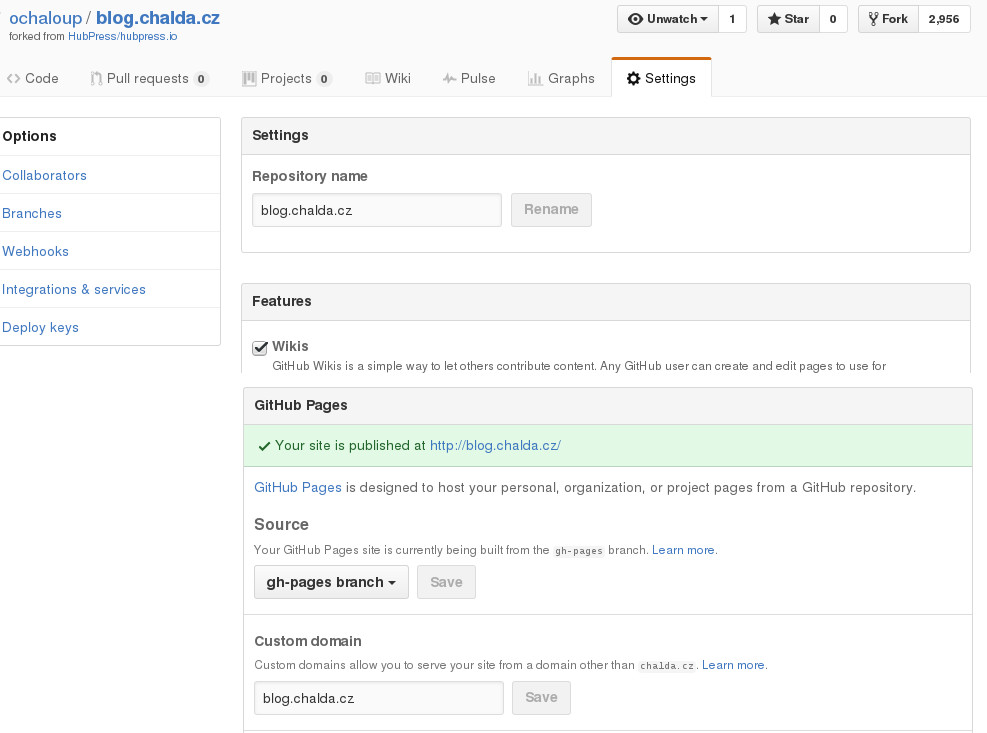
…or if you plan to run HubPress.io blog against your custom domain these steps could be helpful for you
-
Fork repo
-
Fork github repository and set
gh-pagesas default one. -
set the
custom domainfield to name of your domain
-
|
Note
|
Having set the The content of the file is just the name of your custom domain - thus what you put to the field. |
-
change
hubpress/config.jsonfile to contain (meta)data-
username
-
repositoryName
-
branch
-
cname in my case it was like this
-
{
  "meta": {
    "username": "ochaloup",
    "repositoryName": "blog.chalda.cz",
    "branch": "gh-pages",
    "cname": "blog.chalda.cz",
  }
}|
Note
|
|
-
When all is set fine you can now go to
HubPress.ioadmin page which is hidden under subaddresshubpress. In my case it’s at path http://blog.chalda.cz/hubpress. You need to log in with credentials which you use to login to GitHub. HubPress.io calls directly the GitHub identification service to confirm that you are the owner of the repo. -
Afte the first login you can see empty screen. That’s ok and just create a new article.
[Updated] for version0.8.0it seems that there is already shown information that you have 0 posts so it’s not misleading already. -
For Disqus you need short name for your site to be set in HubPress.io. You will find it when already having page under Discusq when you go
Admin→Settings→ choose page →General→Shortname
That’s more or less it. Now it’s time to write and experiment.